15 Paper Plate Halloween Crafts for Kids
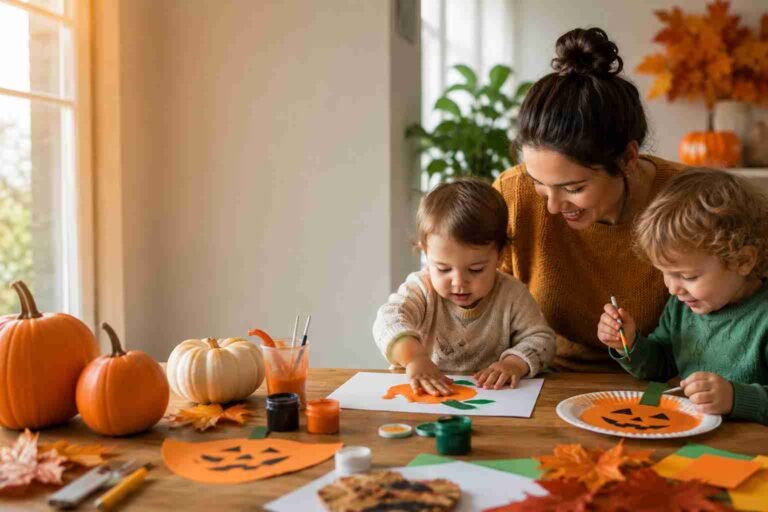
Eeshan was 3 years old on a rainy October afternoon when we decided paper plate halloween crafts were a good idea. They were. The finished bat went on the fridge. The orange paint did not fully wash off the ceiling for two months. I am not explaining how. These 15 paper plate halloween crafts for kids are sorted by age and difficulty, each one rated for mess level so you can decide in advance whether today is a newspaper-on-the-floor kind of day or not.
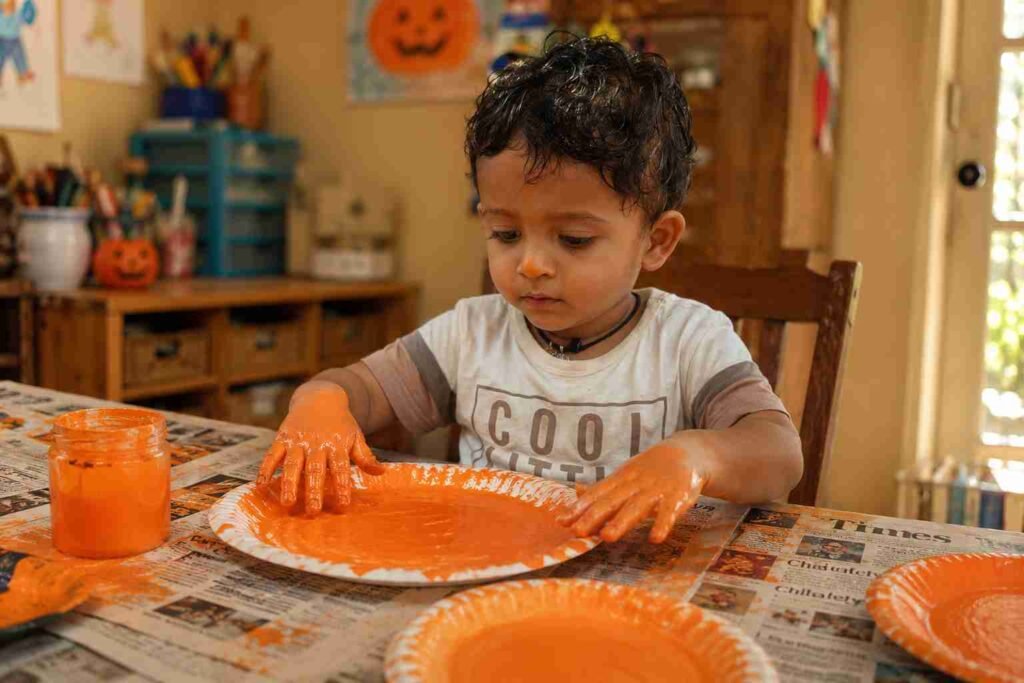
Easy paper plate halloween crafts for toddlers (ages 2 to 4)
Paper plate crafts halloween activities for toddlers need one rule above everything else: the finished product should be achievable in one sitting. A toddler who cannot finish a craft in 20 minutes will not finish it at all. Every craft in this section takes 15 to 25 minutes including drying time for a 2 to 4-year-old, and the steps are simple enough that the adult’s primary job is setup and paint mixing, not execution.
Spandana’s classroom rule for toddler craft sessions: cut all the pieces before the child arrives at the table. A toddler who has to wait for cutting loses the window. Have everything ready, put the child in front of it, step back. The results are always better when the adult’s involvement ends at preparation.
1. Paper plate ghost craft
Age: 2+ | Mess level: 2/5 | Time: 20 minutes
The ghost paper plate craft is the simplest Halloween craft for toddlers in this collection and the one to start with if your child has never done paper plate crafts before. One paper plate, white paint, two googly eyes, a black marker for the mouth. That is the complete materials list.
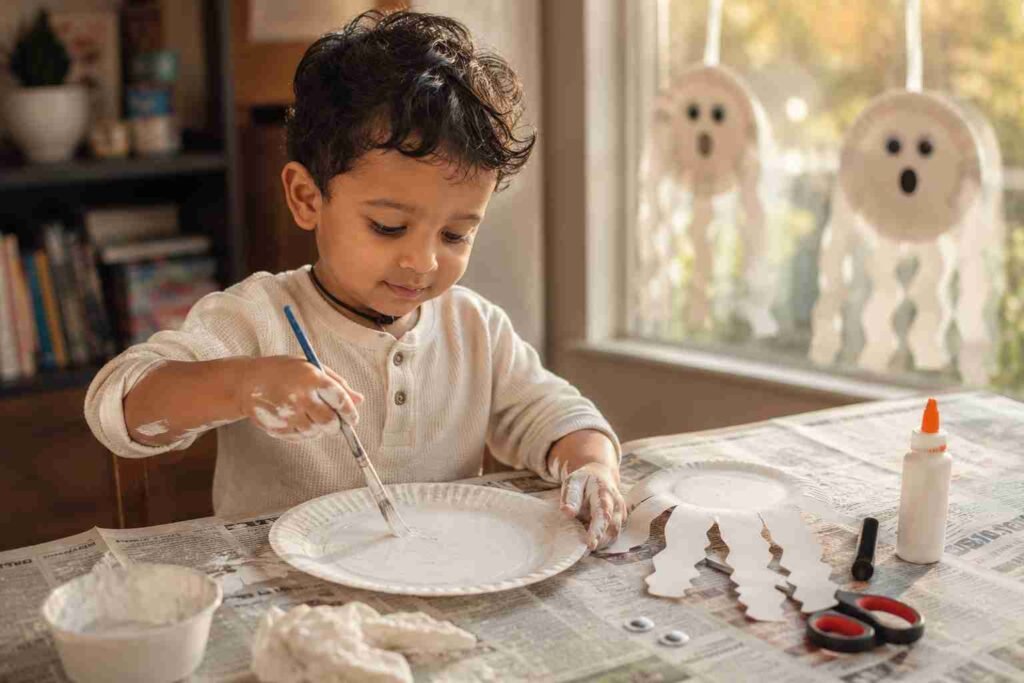
How to make it:
- Paint the paper plate white or leave it unpainted if your plates are already white.
- While the paint dries, cut two wavy strips from the bottom of a second plate to create the ghost’s trailing edges. Set aside.
- Once dry, glue the wavy strips to the back of the main plate at the bottom so they hang down slightly.
- Glue two googly eyes to the front.
- Draw a round open mouth with black marker.
- Add a loop of string at the top and hang in a window.
What went wrong for us: Vihaan at 2 ate one googly eye before it was glued down. We now give him the eyes one at a time.
If the child loses interest: Stop at step 4. Two googly eyes on a white plate is a complete ghost and a 2-year-old will be satisfied with it.
2. Paper plate pumpkin craft
Age: 2+ | Mess level: 3/5 | Time: 25 minutes
The paper plate pumpkin is orange paint and a green stem , as simple as Halloween crafts with paper plates get. The mess level is 3 because orange paint on small hands transfers enthusiastically to everything nearby.
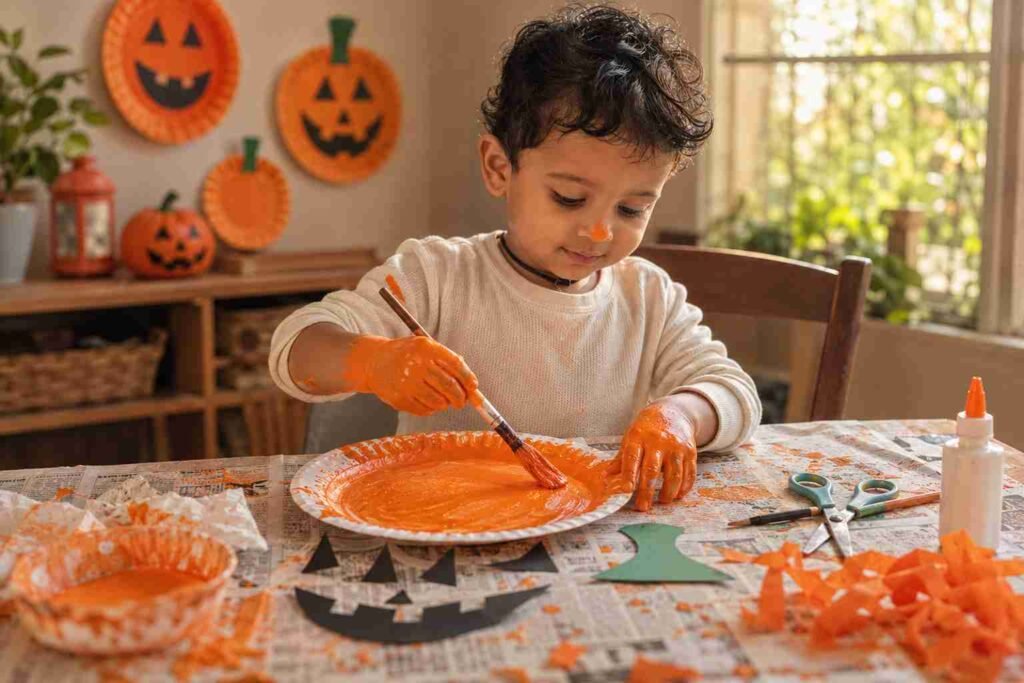
How to make it:
- Paint the paper plate orange. Let dry completely , this is the step parents most often skip, with predictable results.
- Cut a simple stem shape from green card stock or a green paper plate. Glue to the top back of the orange plate.
- Cut triangle shapes from black card for eyes, nose, and the mouth gaps. Glue to the front of the orange plate.
- Optional: add orange streamers or tissue paper curls around the edge for a decorative border.
Eeshan’s version at age 3: He insisted the pumpkin should have five eyes. We obliged. Five-eyed pumpkins are canonically valid in our house.
If the child loses interest: Skip the black features and draw them on with marker instead. Still a complete pumpkin.
3. Paper plate spider web craft
Age: 3+ | Mess level: 2/5 | Time: 20 minutes
This craft uses white paint on a black paper plate, or black paint on a white plate. The spider web pattern is made by pressing a fork into wet paint and dragging outward from the centre , a technique that looks impressive and requires minimal fine motor control, making it ideal for ages 3 to 5.
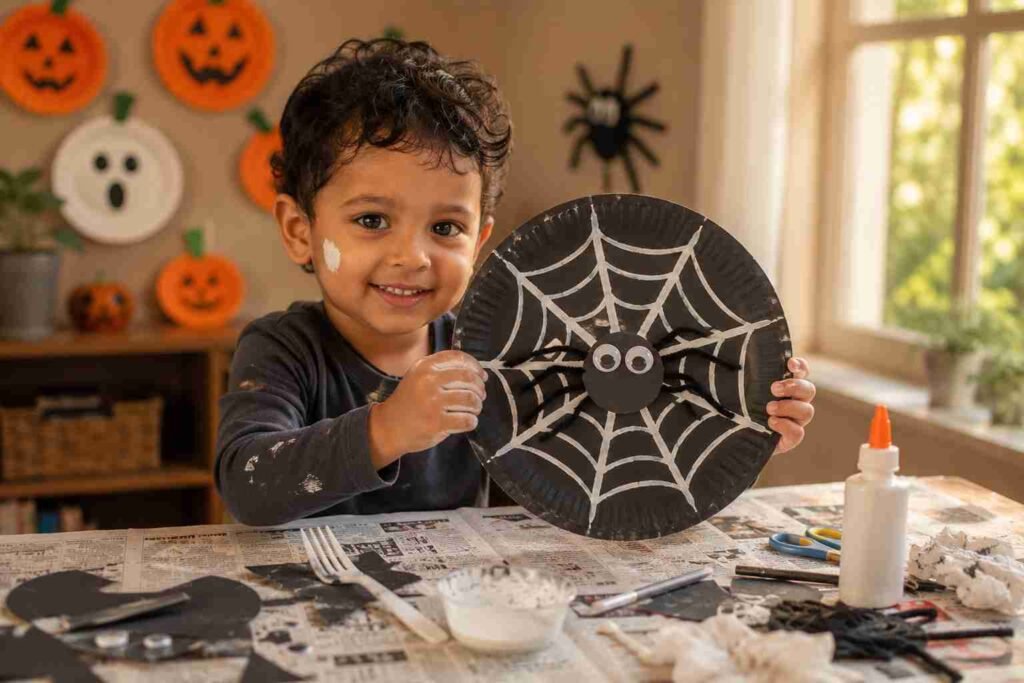
How to make it:
- Paint the plate black (or start with a black plate).
- While still wet, use a fork to drag white paint from the centre outward in straight lines at regular intervals, creating the web spokes.
- Connect the spokes with curved lines using a fine brush or a cotton bud dipped in white paint.
- Cut a small spider body from black card, add googly eyes, attach thin black yarn legs (4 on each side), and glue to the web.
The fork technique: Spandana used this in her classroom every October. The children who struggled with fine motor tasks loved it because the fork does the accuracy work for them. The result looks like real skill regardless of the child’s motor development.
If the child loses interest: The spoke lines alone are a complete web. Skip the curved connecting lines and the spider, and it still works as decoration.
4. Paper plate cat craft
Age: 3+ | Mess level: 3/5 | Time: 25 minutes
A black cat from a paper plate is the easiest animal craft in this collection and the one most likely to survive repeated making , Eeshan made four black cats in one October afternoon and gave them different personalities. By cat four, he had named all of them.
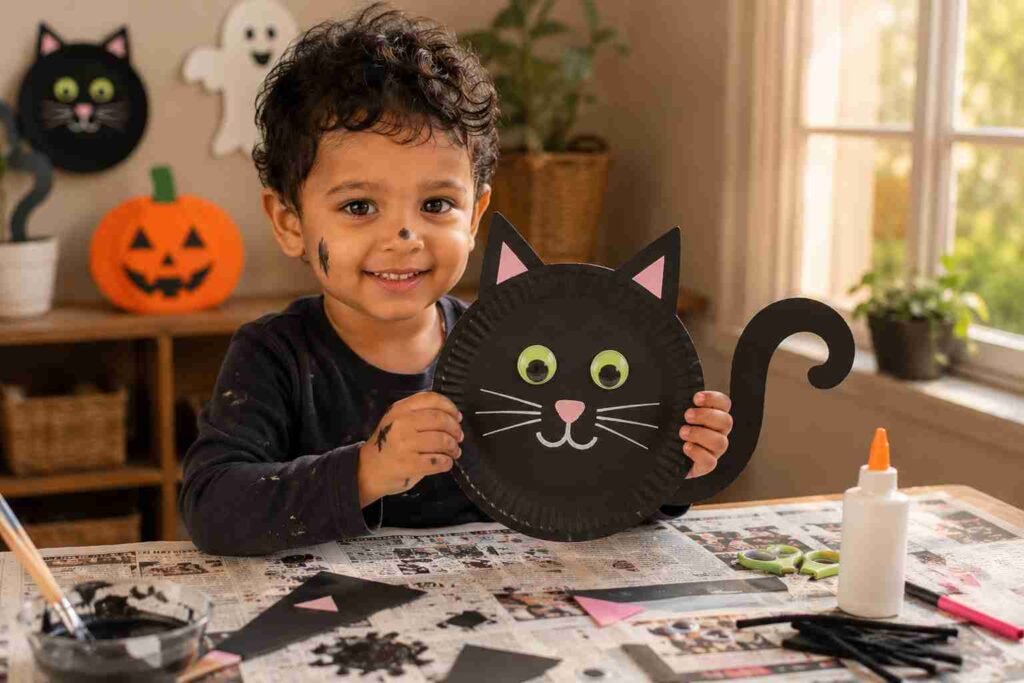
How to make it:
- Paint the plate black. Let dry.
- Cut two triangles from black card for the ears. Glue to the top back of the plate so the points extend above the rim.
- Add two green or yellow googly eyes.
- Cut short strips of thin black card or use pipe cleaners for whiskers (3 each side). Glue below where the nose will be.
- Draw a small triangle nose and curved mouth with pink or white paint pen or marker.
- Add a long black tail from card, curling it upward at the tip.
If the child loses interest: Ears and eyes only is a recognisable cat. The whiskers and tail are enhancements, not essentials.
5. Paper plate witch hat craft
Age: 3+ | Mess level: 2/5 | Time: 20 minutes
This craft turns a paper plate into the brim of a witch’s hat, with a cone made from black card forming the crown. Lower mess level because it is primarily painting and assembly rather than freeform painting.
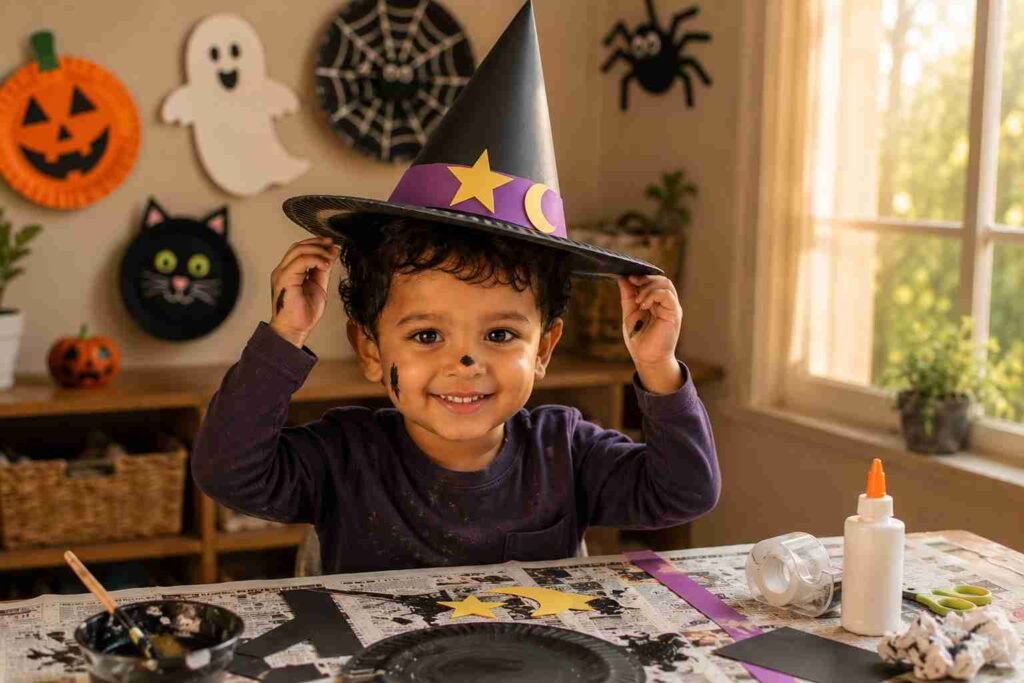
How to make it:
- Paint the paper plate black. Let dry.
- Roll a large sheet of black card into a cone and tape the seam. Trim the base to sit flat.
- Cut a hole in the centre of the painted plate slightly smaller than the base of the cone.
- Push the cone up through the hole and glue in place.
- Decorate with a purple or orange strip of paper around the base of the cone for the hat band. Add a star or moon cut from yellow card.
- The finished hat can be worn if the cone base is sized to fit the child’s head , measure first.
Spandana’s classroom version: She made these as wearable hats for the class Halloween party. Measuring twenty-five head sizes in advance is harder than it sounds. Size the cone for the largest head in the class and pad smaller ones with tissue paper inside the brim.
If the child loses interest: A painted black plate is already a witch hat brim. Lean it against the wall for decoration without the cone.
Halloween crafts with paper plates , medium difficulty (ages 4 to 6)
Medium difficulty halloween paper plate crafts add more steps, more cutting, and more independent decision-making. The adult prepares the materials and explains the steps, but the child executes each one without being guided through it in real time. A 4-year-old can follow three-step instructions independently. A 6-year-old can follow five steps. These crafts sit in that range.
Mess level increases in this section because more tools are in use simultaneously. Prepare a dedicated craft space before starting any of these. Eeshan at 5 referred to this space as “the disaster zone” and this is accurate.
6. Paper plate frankenstein craft
Age: 4+ | Mess level: 3/5 | Time: 30 minutes
Frankenstein’s monster from a paper plate: green paint, black hair from torn tissue paper, stitches drawn on with marker, bolt shapes from silver card. The stitches are the detail children focus on most , children who have had stitches at the doctor treat this craft with a very specific authority.
How to make it:
- Paint the plate green. Let dry.
- Tear strips of black tissue paper and glue across the top of the plate for hair. Overlapping torn edges look more realistic than cut edges here.
- Add googly eyes and a mouth drawn with black marker , a straight line with stitches across it for the classic Frankenstein expression.
- Draw or paint horizontal stitch lines across the forehead with black paint or marker.
- Cut two small rectangles from silver card or foil for the neck bolts. Glue to the sides of the lower plate where it would meet the neck.
- Cut a black bowtie shape and add to the chin area.
If the child loses interest: Green plate with googly eyes and a mouth drawn in marker is recognisable as Frankenstein without the bolts, stitches, or hair.
7. Paper plate mummy craft
Age: 4+ | Mess level: 2/5 | Time: 25 minutes
The mummy is one of the few Halloween paper plate crafts that requires almost no paint , it is white plates and white strips of crepe paper or toilet paper, which makes it one of the tidiest crafts in this collection despite the visual complexity of the finished result.
How to make it:
- Start with a white paper plate unpainted.
- Cut or tear strips of white crepe paper, toilet paper, or white tissue paper approximately 2cm wide.
- Glue the strips across the plate in overlapping diagonal lines, leaving small gaps for the eyes.
- Add two googly eyes in the gaps left for them.
- For the body: cut a second plate in half and cover both halves with strips the same way. Attach below the face plate.
- Add thin paper strip arms extending from the sides, covered in the same wrapping pattern.
What works about this craft: The wrapping is repetitive and calming , children who find craft activities over-stimulating often stick with this one longer than more chaotic crafts because the action is predictable. Spandana noticed this in her classroom and kept the mummy craft specifically for the children who needed a lower-intensity October activity.
If the child loses interest: A face plate covered with strips and two googly eyes is a complete mummy. The body is optional.
8. Paper plate vampire craft
Age: 4+ | Mess level: 3/5 | Time: 30 minutes
How to make it:
- Paint the plate pale grey or white. Let dry.
- Cut a black cape shape from card , a rectangle with a scalloped or pointed bottom edge. Attach to the back of the plate so it extends below the face.
- Add googly eyes and draw dark eyebrows with black marker , angled downward for the classic vampire expression.
- Cut two small white fang shapes from card and glue below where the mouth will be, pointing downward.
- Add a small red line below the fangs for the dramatic effect.
- Cut slicked-back black hair from card or use black paint for the hair shape.
Age note: The cape construction makes this harder than the simpler face plates , ages 4 and under may need the cape pre-cut and the construction simplified to paint, eyes, and fangs only.
If the child loses interest: Pale plate, googly eyes, two fang shapes glued on. Complete vampire in three steps.
9. Paper plate scarecrow craft
Age: 5+ | Mess level: 3/5 | Time: 35 minutes
The scarecrow is the most distinctly autumn of the halloween paper plate crafts in this collection , straw hat, patchy fabric clothing, stitched face. A good choice for children who are not drawn to monster-themed crafts but still want to make something Halloween-adjacent.
How to make it:
- Paint the plate skin-coloured or light brown. Let dry.
- Add stitched eyes: two X shapes drawn with black marker rather than googly eyes.
- Draw a stitched mouth: a curved line with short vertical stitches across it.
- Glue yellow wool or yellow tissue paper strips around the bottom and sides of the face for straw hair.
- Cut a small wide-brimmed hat from brown card and glue at the top of the plate, tilted slightly.
- Add fabric scraps or patches cut from coloured paper at the bottom of the plate for the scarecrow’s patched clothing.
If the child loses interest: Stitched eyes and mouth on a painted plate is a recognisable scarecrow face without the hat or hair.
10. Paper plate owl craft
Age: 5+ | Mess level: 3/5 | Time: 35 minutes
Owls are a classic October craft because they straddle Halloween and general autumn. Children who have encountered owls in Halloween books find this craft immediately appealing; children who haven’t connect it to woodland and autumn imagery equally well.
How to make it:
- Paint the plate brown, reddish-brown, or grey. Let dry.
- Fold a second plate in half and cut two large oval eye shapes from the fold. Unfold slightly and glue the edges together to create two dome-shaped eyes. Attach to the upper front of the first plate.
- Colour the dome eyes yellow and add a black circle pupil.
- Cut a small diamond shape from orange card for the beak and fold it in half. Glue between the eyes.
- Tear small pieces of brown, orange, and yellow paper to create feather texture across the body of the plate. Glue in overlapping layers.
- Cut two wing shapes from folded card and attach to the back of the plate on each side.
If the child loses interest: The dome eyes and beak on a painted plate are the most recognisable elements. Stop there.
More involved paper plate crafts halloween designs (ages 6 to 8)
The crafts in this section take 40 to 60 minutes and involve multi-step construction, more materials, and more adult preparation time. For a classroom Halloween party, these are the crafts to assign to older children who have already finished a simpler craft and want more. At home, these are rainy Saturday afternoon crafts rather than after-school activities.
According to the American Academy of Pediatrics, craft and art activities in childhood support fine motor development, creative problem-solving, and the ability to sustain attention. Paper plate crafts specifically are recommended as accessible, low-cost creative activities that produce a finished result children feel proud of , the pride of completion being as important as the skill development itself.
11. Paper plate haunted house craft
Age: 6+ | Mess level: 3/5 | Time: 45 minutes
How to make it:
- Cut the paper plate in half horizontally. The bottom half becomes the house body, the top half becomes the roof when cut into a pointed shape.
- Paint the house body black with yellow rectangles for glowing windows. Let dry.
- Paint the roof piece black. Attach above the house piece.
- Add a moon (yellow circle) to the upper background area behind the house.
- Cut bare tree shapes from black card and attach on either side of the house.
- Add a small ghost peeking from one window using white tissue paper.
- Glue the complete scene onto a sheet of dark blue or black card for display.
If the child loses interest: House body with painted windows and the roof piece is a complete haunted house. Skip the trees, moon, and ghost additions.
12. Paper plate spider web mobile craft
Age: 6+ | Mess level: 2/5 | Time: 40 minutes
A hanging mobile made from two overlapping paper plates with a web pattern painted between them, and three to five small spiders hanging on black thread at different lengths below. Lower mess level because it is primarily painting and assembly.
How to make it:
- Paint both plates black. Let dry.
- Use white paint and a fine brush to paint a web pattern across both plates.
- Overlap the two plates slightly and glue together.
- Make three to five small spiders by wrapping black pipe cleaners into a body shape and adding googly eyes.
- Tie each spider to a different length of black thread.
- Attach threads to the bottom edge of the web at intervals.
- Add a string loop to the top for hanging.
13. Paper plate frankenstein and bride two-plate craft
Age: 6+ | Mess level: 3/5 | Time: 50 minutes
Two paper plates side by side , Frankenstein’s monster on one and the Bride of Frankenstein on the other. Eeshan at 6 made these for his teacher and spent more time on the Bride’s hair than on any other element of either craft, which is evidence of genuine artistic priority and should be respected.
How to make it:
- Paint one plate green for Frankenstein, one plate pale white for the Bride.
- Complete the Frankenstein craft as in craft #6 above.
- For the Bride: add large googly eyes with darkly drawn eyelashes, a small red mouth, and the signature tall black-and-white streaked hair. Create the hair from black and white paper strips glued upward from the plate and shaped into a tall, dramatic style.
- Connect the two plates with a strip of black card at the bottom to make them a pair.
14. Paper plate halloween garland craft
Age: 6+ | Mess level: 3/5 | Time: 60 minutes
A garland of five or six small paper plates, each painted with a different Halloween character and strung together with black ribbon or twine. This is the most involved paper plate halloween craft in this collection and produces the most display-worthy result. In Spandana’s classroom this was always the end-of-October whole-class project , each child made one plate for the communal garland.
How to make it:
- Choose five or six Halloween characters: ghost, pumpkin, bat, cat, witch, spider.
- Paint each plate in the appropriate base colour for each character. Let all dry simultaneously.
- Complete each character face using the techniques from the earlier crafts in this guide.
- Once all are complete and fully dry, punch a hole at the top and bottom of each plate.
- Thread black ribbon through the holes, spacing plates evenly.
- Hang across a mantle, window, or classroom wall.
Time tip: The simultaneous drying of multiple plates is the key time-saver. Set all base coats at once and move through the characters in sequence while each dries.
15. Paper plate halloween treat bag craft
Age: 7+ | Mess level: 2/5 | Time: 40 minutes
A functional paper plate halloween craft , two plates stapled together around the edges with a gap at the top, handles added, and the outside decorated as a Halloween character. Can be used as a small treat bag for a classroom party or as a candy sorting bag at home. Eeshan at 7 made one as a pumpkin and used it to carry his trick-or-treat overflow.
How to make it:
- Paint both plates on the outside (the underside) with the character’s base colour. Let dry.
- Place plates together with painted sides facing out and staple around the rim at 2cm intervals, leaving the top 10cm unstapled as the opening.
- Punch two holes on either side of the opening and thread ribbon or cord through for handles. Knot inside to secure.
- Decorate the outside of the bag with the character face of your choice using the techniques from the earlier crafts.
Supplies needed for paper plate halloween crafts
Every craft in this collection uses some combination of the following. Having all of these on hand before starting means no mid-craft interruptions for missing materials, which is the most common reason a Halloween paper plate craft gets abandoned.
- Paper plates , standard size, white. Budget 2 to 3 plates per child per session.
- Tempera or acrylic craft paint , black, white, orange, green, brown. Tempera washes out of clothing; acrylic does not. Choose accordingly.
- Black card stock , for hair, hats, capes, cut-out features.
- Googly eyes , multiple sizes. Buy more than you think you need.
- Craft glue or glue sticks , PVA for paper, glue stick for lighter paper layers.
- Black marker , for faces, stitches, outlines.
- Scissors , adult scissors for pre-cutting, child safety scissors for the child’s cutting steps.
- Newspaper or a craft mat , for the table. The pumpkin craft will teach you this if you skip it once.
- Paint brushes , wide flat brush for base coats, thin brush for detail.
For more Halloween activities to pair with these crafts, our cute Halloween coloring pages are a good quiet follow-up activity once the painted crafts are drying. Our Halloween jokes for kids give children something to do with their hands occupied at the craft table , reading jokes aloud while waiting for paint to dry is a legitimate craft session activity. And our fall would you rather questions for kids works for the same reason.
Frequently asked questions
What are the easiest paper plate halloween crafts for toddlers?
Among the easiest paper plate halloween crafts for toddlers: the ghost, pumpkin, and spider web. For the ghost, only paint and googly eyes are needed with no cutting by the child. The pumpkin is equally simple with slightly more steps. A spider web fork technique looks impressive but requires zero fine motor skill, making it accessible from age 3. All three can be completed in under 25 minutes.
What materials do I need for paper plate halloween crafts?
The core materials for halloween crafts with paper plates are standard white paper plates, tempera or acrylic paint in black, white, orange, and green, black card stock, googly eyes in assorted sizes, craft glue, a black marker, and scissors. Most paper plate halloween crafts can be made with these seven materials alone. The more involved crafts in this collection also use pipe cleaners, ribbon, crepe paper, and tissue paper but none of these are essential for the simpler crafts.
How messy are paper plate halloween crafts?
Mess level varies significantly by craft. The ghost, mummy, spider web mobile, and witch hat are the tidiest options , rated 2 out of 5 in this collection. The pumpkin, cat, Frankenstein, vampire, and garland are rated 3 out of 5 and benefit from a table covering. No craft in this collection reaches 4 or 5 on the mess scale with reasonable preparation. Cover the table with newspaper before starting any painted craft and have wet paper towels nearby for hand wiping between colours.
Can paper plate halloween crafts be made in a classroom?
Yes. Paper plate halloween crafts work well in classrooms because the materials are inexpensive, the crafts are achievable in a standard 45-minute lesson, and the finished products can be displayed or taken home. For a class of 25, prepare all base paints in advance and have plates pre-labelled with children’s names. The mummy craft is the best option for classrooms because it uses minimal paint, the materials are cheap, and the repetitive wrapping action is calm and manageable for a full class. The garland craft works well as a whole-class collaboration with each child contributing one plate.
What age can children do paper plate halloween crafts independently?
Ages 2 to 3: children need adult setup but can paint, glue, and place eyes independently. Ages 4 to 5: they can follow 3-step instructions without being guided through each step. From age 6 to 7, they can read the instructions and complete most crafts without adult involvement. Full independence on the most complex crafts in this collection is realistic from age 7 upward.