
20 Easy Pumpkin Crafts for Kids
Vihaan met a real pumpkin for the first time at age 2. Patted it. Tried to pick it up and could not. Tried to bite it once, which did not go the way he planned. Then he sat next to it for ten minutes like it was a friend. These pumpkin crafts for kids start from that place, the real pumpkin first, then the craft versions that need no knife, no scooping, and no adult with steady hands. Every craft is sorted by age, rated for mess, and uses materials you already have.
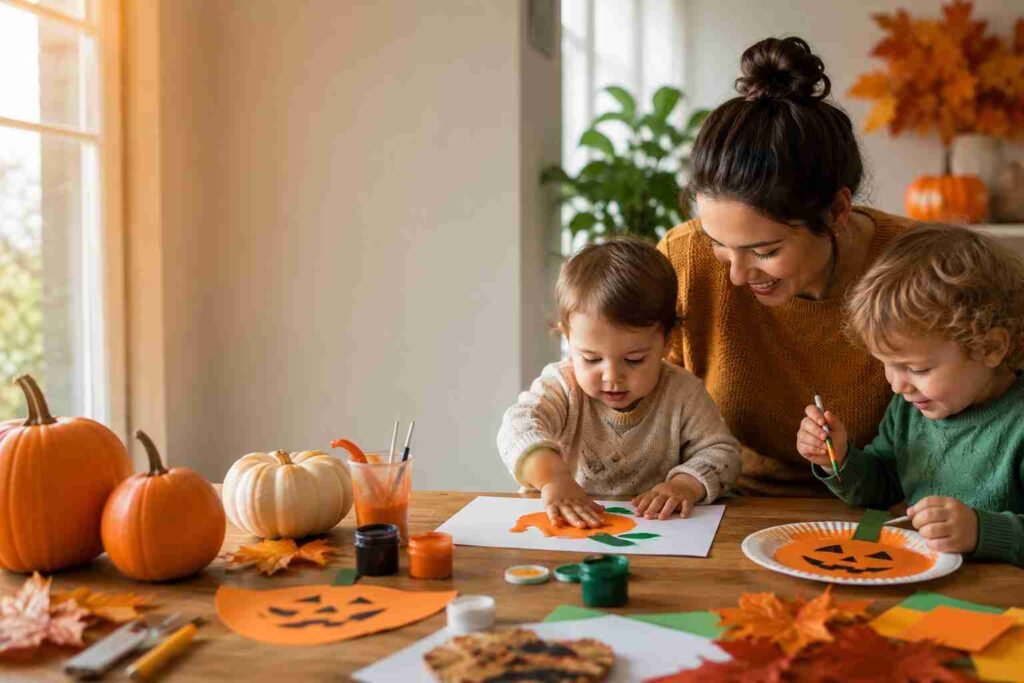
Pumpkin crafts for babies and toddlers (ages 1 to 3)
The best pumpkin crafts for toddlers under 3 are the ones where the child is not making a pumpkin but experiencing pumpkin. Pumpkin stamping, pumpkin printing, pumpkin texture exploration. The finished result matters less than what the child is doing with their hands and their senses during the activity. Spandana’s classroom rule for this age group: if the child is engaged and their hands are busy, the craft is working, regardless of what the page looks like at the end.
Eeshan at 18 months spent a full afternoon pressing his palm into orange paint and then onto paper. He was not making a pumpkin. He was making a handprint. Spandana cut a green stem from the top of each orange handprint and suddenly they were all pumpkins. He did not understand this transformation but he accepted it.
1. Pumpkin handprint craft
Age: 1+ | Mess level: 4/5 | Time: 15 minutes
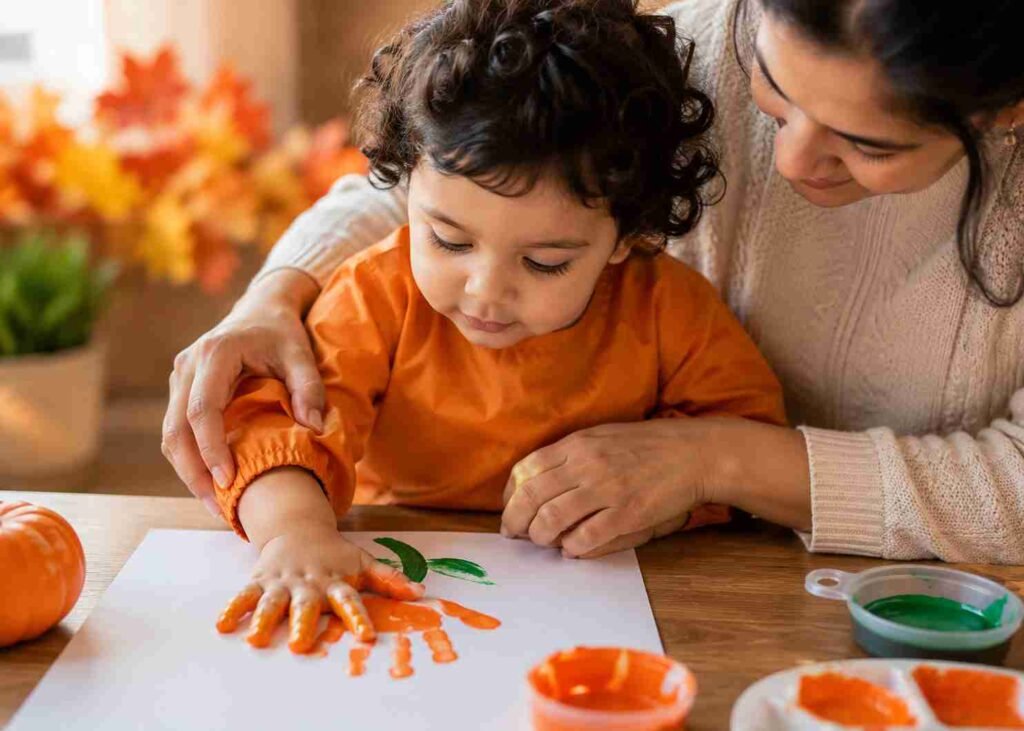
The classic baby pumpkin craft. Orange paint, small hands, a piece of paper. Press the palm and four fingers, leave the thumb out, and the hand shape looks exactly like a pumpkin when you add a green stem at the top. Eeshan’s handprint pumpkins from age 18 months are still in a folder somewhere. They are the most important document in that folder.
How to make it:
- Pour orange paint into a shallow tray wide enough for a small hand.
- Press the child’s palm (not the thumb) into the paint and then press firmly onto white paper.
- Let dry.
- Add a green stem above the thumb gap with green paint or a green marker.
- Draw two small triangle eyes and a smile with black marker.
If the child loses interest: The orange handprint alone is the keepsake. The stem and face are optional.
2. Pumpkin footprint craft
Age: 1+ | Mess level: 4/5 | Time: 20 minutes
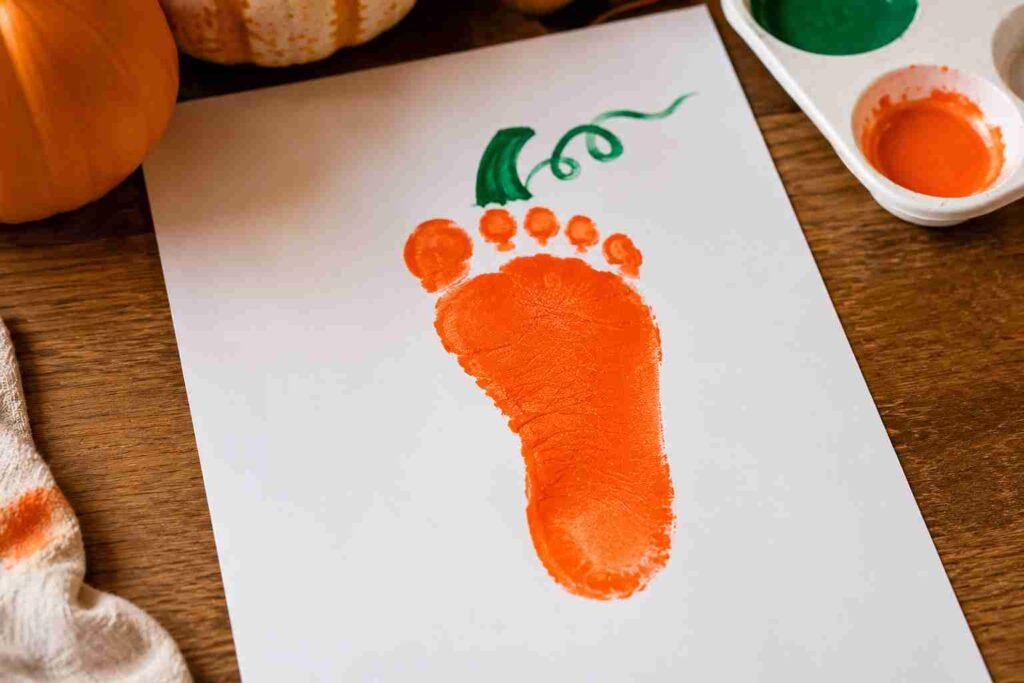
How to make it:
- Paint the bottom of the child’s foot orange.
- Press firmly onto paper with the heel toward the top.
- The toes become the bumpy top of the pumpkin. The heel becomes the round bottom.
- Once dry, add a green stem above the toes and a black jack-o-lantern face on the heel section.
- Frame and hang immediately before you reconsider.
The difficulty: Keeping a toddler still long enough to press their foot flat onto paper. One parent holds, one presses. Three-person operation if the child is enthusiastic about walking away. Vihaan demonstrated this at age 2 , we have one excellent footprint and three orange floor smudges.
3. Pumpkin stamping with real pumpkin
Age: 2+ | Mess level: 3/5 | Time: 20 minutes
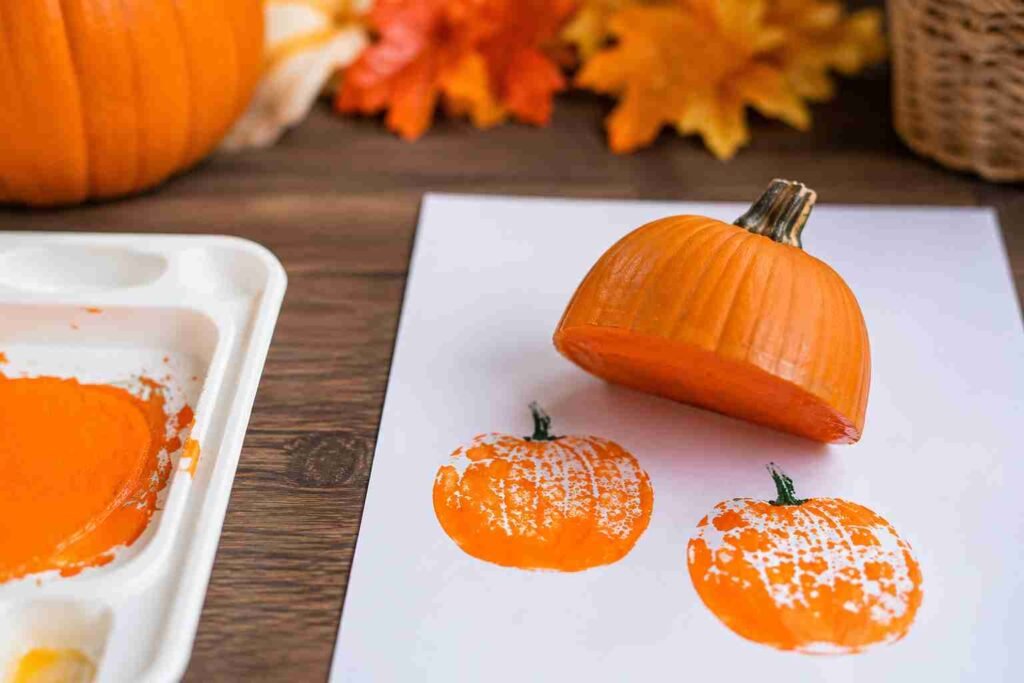
Cut a small pumpkin in half horizontally. The cross-section of a real pumpkin is already an interesting circular shape with seed dividers visible. Press the cut surface into orange paint and stamp repeatedly onto paper. The result is a pumpkin pattern that a child cannot produce with a brush , the authentic texture of a real pumpkin cross-section transfers with each print.
Vihaan’s encounter with the cut pumpkin half was more interested in the seeds than the stamping. He collected twelve seeds before the stamping started. This is also a valid activity.
How to make it:
- Adult cuts a small decorative pumpkin in half horizontally.
- Pat the cut surface dry with a paper towel.
- Pour orange paint into a shallow tray.
- Dip the cut surface into the paint and press firmly onto paper.
- Repeat in different positions across the paper to build a pumpkin pattern.
- Let dry and display as-is or add jack-o-lantern faces with black marker.
4. Pumpkin sponge painting craft
Age: 2+ | Mess level: 3/5 | Time: 20 minutes
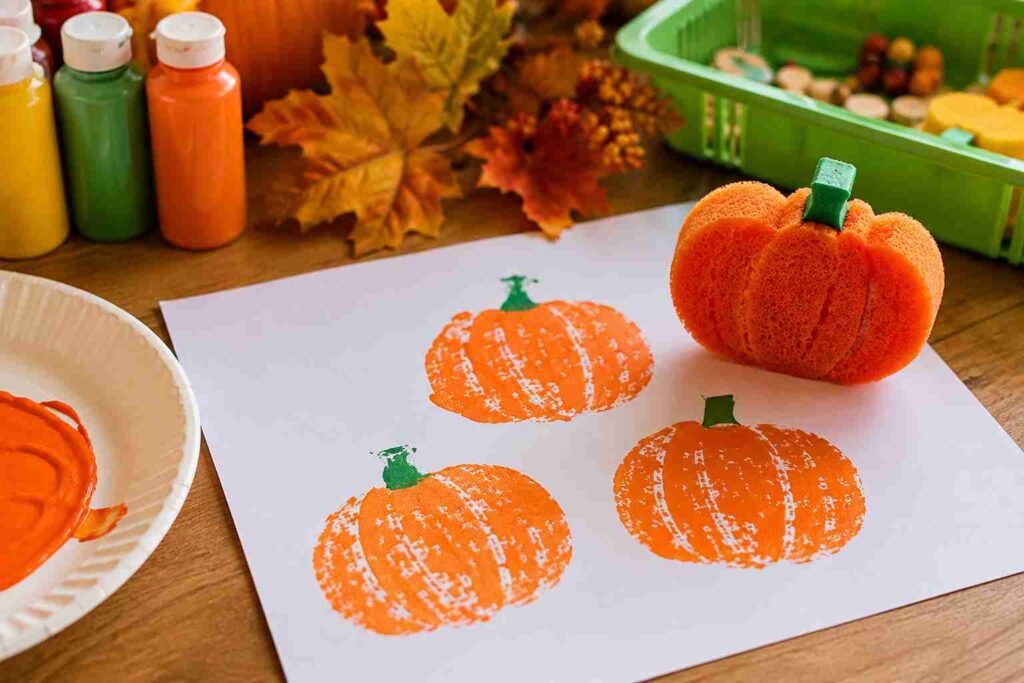
Cut a kitchen sponge into a simple oval or round pumpkin shape. Use it to dab orange paint onto paper in repeated presses. The sponge technique requires less fine motor control than a brush and produces a textured surface that looks more interesting than flat painted pumpkins.
How to make it:
- Cut a round or oval shape from a kitchen sponge.
- Cut vertical slits partway into the sponge to suggest the pumpkin ridges.
- Dip into orange paint and press onto paper repeatedly.
- Once dry, use a smaller sponge piece dipped in black paint to add eyes, nose, and mouth.
- Paint a green stem above with a brush or add a cut paper stem.
5. Paper bag pumpkin craft (no-mess version for babies)
Age: 1+ | Mess level: 1/5 | Time: 15 minutes
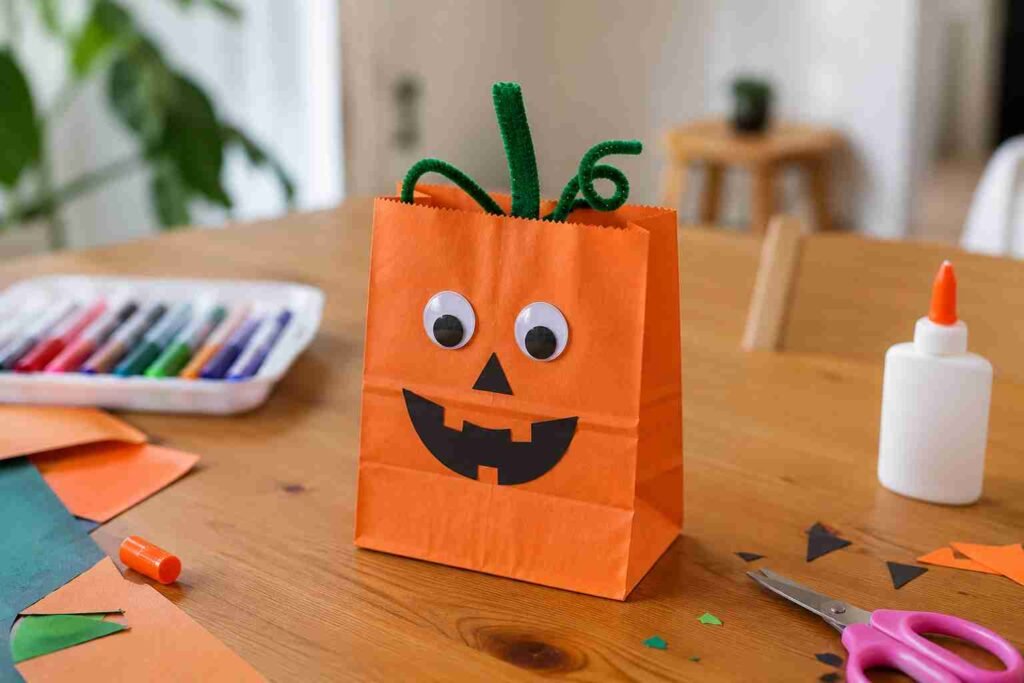
The lowest mess halloween pumpkin craft in this collection. Stuff an orange paper lunch bag with crumpled newspaper, gather the top, and tie with green ribbon or pipe cleaner to form the stem. Add googly eyes and a drawn mouth. Done. No paint, no waiting to dry, achievable in ten minutes with a child who is watching. Spandana used these as classroom decorations for three consecutive Octobers , 25 paper bag pumpkins lined up on the windowsill is a genuinely impressive display.
How to make it:
- Crumple newspaper or tissue paper and stuff into an orange paper bag.
- Gather the top of the bag and twist closed.
- Secure the twist with green pipe cleaner or green ribbon, curling the pipe cleaner tip into a tendril.
- Add two googly eyes and a mouth drawn with black marker.
- Display upright.
Easy pumpkin crafts halloween designs (ages 3 to 5)
At ages 3 to 5, children can apply paint with a brush with reasonable accuracy, use safety scissors for simple cuts, and follow two or three step instructions. The halloween craft pumpkin activities in this section use these developing skills and produce recognisable pumpkins that children feel proud of without adult intervention at every step.
The differentiator between a 3-year-old craft and a 5-year-old craft is largely about how many decisions the child makes independently. At 3, the child colours within a defined space. At 5, the child decides what face the pumpkin should have and how to execute it. Design the instruction level accordingly.
6. Paper plate pumpkin craft
Age: 3+ | Mess level: 3/5 | Time: 25 minutes
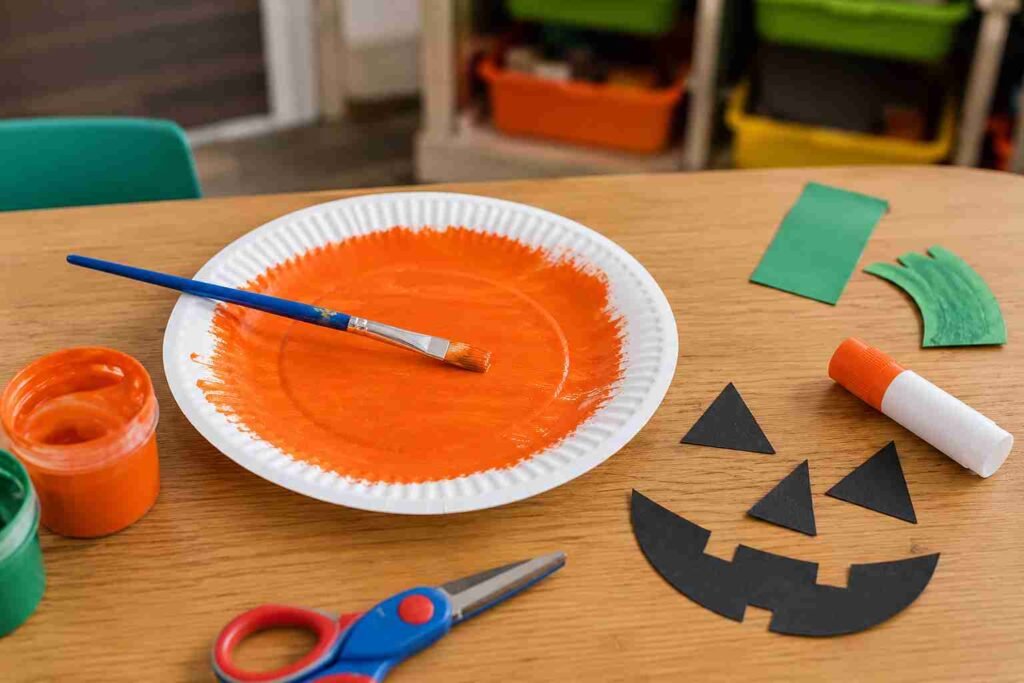
A paper plate painted orange with a black jack-o-lantern face and a green card stem. The foundational halloween pumpkin craft and the one that appears in every classroom October art display because it reliably produces a clear, colourful, child-made pumpkin that parents immediately put on the fridge. Eeshan’s kindergarten pumpkin did not stay in the lines. He was completely unbothered by the lines. It is on the fridge.
How to make it:
- Paint the paper plate orange. Let dry completely.
- Cut triangle eyes, a triangle nose, and a gap-toothed smile from black card. Glue to the front of the plate.
- Cut a stem shape from green card and glue to the top back of the plate.
- Add a small green card leaf beside the stem for extra detail.
See our paper plate halloween crafts post for the full paper plate pumpkin tutorial including the squeeze technique that gives the plate a more rounded pumpkin shape.
7. Toilet roll pumpkin craft
Age: 2+ | Mess level: 3/5 | Time: 25 minutes
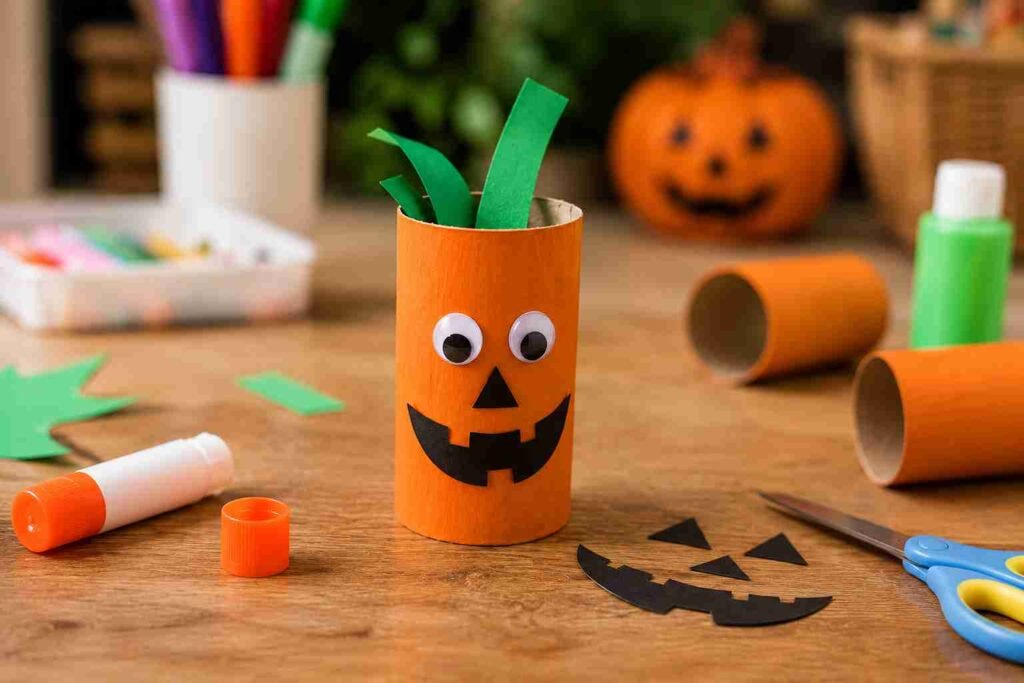
An orange-painted toilet paper roll becomes a 3D pumpkin when squeezed gently at the top and bottom and given a green card stem. The squeeze step is the one children enjoy most. Vihaan at 2 squeezed his roll out of shape entirely and was satisfied with the result. This is correct behaviour.
See our toilet paper roll halloween crafts post for the full toilet roll pumpkin construction steps.
8. Pumpkin face painting on a real pumpkin (no carve)
Age: 3+ | Mess level: 2/5 | Time: 20 minutes
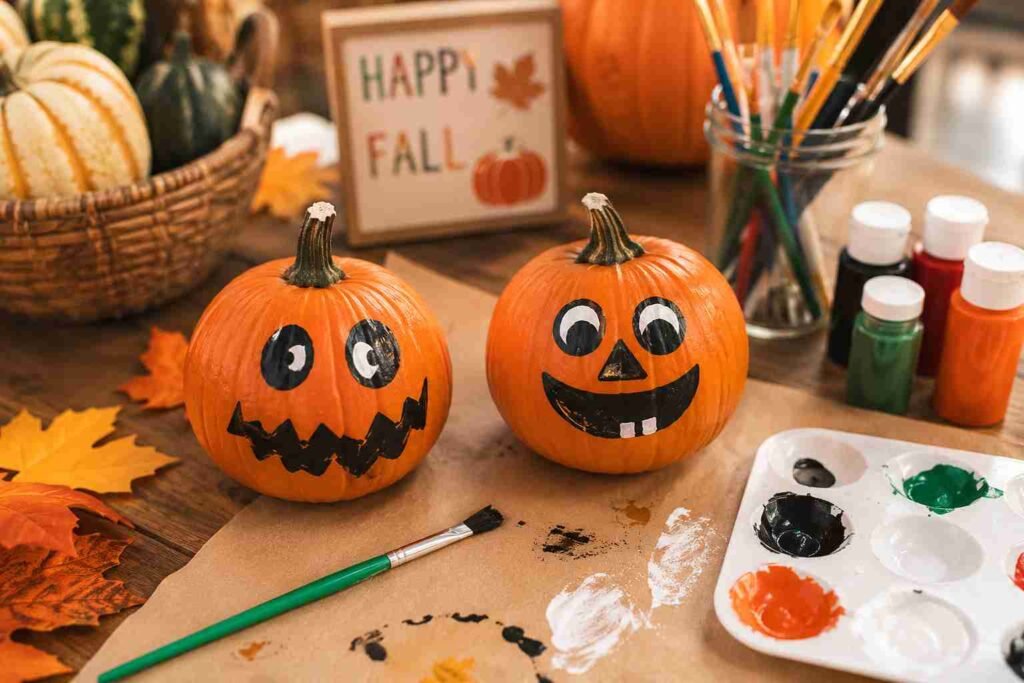
Paint a jack-o-lantern face directly onto a real small pumpkin using acrylic craft paint. No carving, no scooping, no safety issues. The painted pumpkin lasts longer than a carved one and can be repainted if the child changes their mind about the face design. Eeshan repainted his three times before settling on a face. The final face had seven eyes. He was not apologetic about this.
How to make it:
- Wipe the pumpkin surface clean and let dry.
- Paint a black face directly onto the pumpkin surface , eyes, nose, mouth in whatever design the child chooses.
- Let dry for 20 minutes before handling.
- Optional: paint the entire pumpkin a base colour first and let dry before adding the face.
Age note: Real pumpkins are heavy. A toddler painting a real pumpkin needs it secured in a tray or bowl so it does not roll. A craft pumpkin from a dollar store works equally well and is lighter.
9. Pumpkin mosaic craft
Age: 4+ | Mess level: 2/5 | Time: 30 minutes
A pumpkin shape drawn on card, filled with torn or cut pieces of orange, yellow, and red tissue paper or magazine pages glued inside the outline to create a mosaic effect. Lower mess than painting because it is primarily tearing and gluing rather than liquid paint.
How to make it:
- Draw a large simple pumpkin outline on white card and cut it out.
- Tear or cut orange, yellow, and red tissue paper or paper into small pieces approximately 2cm square.
- Apply glue to a small section of the pumpkin shape and press paper pieces onto it.
- Continue until the pumpkin shape is fully covered.
- Add a green card stem and leaf once the glue dries.
What children discover with this craft: Different shades of orange, yellow, and red create a more interesting result than solid orange. Children who experiment with colour mixing within the mosaic produce something genuinely more beautiful than single-colour versions.
10. Pumpkin fork painting craft
Age: 3+ | Mess level: 3/5 | Time: 20 minutes
Press a plastic fork dipped in orange paint downward repeatedly to create the vertical ridge texture of a real pumpkin’s surface. The fork technique is the same one used in the spider web craft in the paper plate post , it looks like genuine technique and requires zero fine motor precision, making it perfect for ages 3 to 5.
How to make it:
- Draw a simple pumpkin outline on white paper.
- Dip a plastic fork into orange paint.
- Press the fork tines vertically inside the pumpkin outline, dragging slightly downward to create ridges.
- Repeat until the pumpkin interior is filled with ridge texture.
- Once dry, add a green stem and a black face with marker.
No carve pumpkin crafts for ages 5 to 8
No carve pumpkin crafts let older children create decorative pumpkins without adult intervention at the dangerous steps. Punching, painting, decoupaging, and decorating with materials that adhere to the pumpkin surface produce results that often look more interesting than carved pumpkins, last longer, and can be made entirely independently from age 5 upward.
Spandana’s class made no carve pumpkins for three consecutive Halloweens after she introduced the idea in year two of teaching. The class voted overwhelmingly to continue the no-carve approach over carving in subsequent years. Their reasoning: “you can do more things.” They were right. Carving limits a pumpkin to one face. Decorating is unlimited.
11. Decoupage pumpkin craft
Age: 5+ | Mess level: 3/5 | Time: 45 minutes
How to make it:
- Tear or cut tissue paper, magazine pages, or patterned paper napkins into strips or small pieces.
- Mix PVA glue with a small amount of water to make a decoupage medium.
- Brush the glue mixture onto a section of the pumpkin surface.
- Layer paper pieces onto the glued section, overlapping edges.
- Brush more glue over the top of the paper pieces.
- Continue until the pumpkin surface is covered.
- Let dry for several hours. The finished pumpkin has a layered, papier-mache quality.
12. Washi tape pumpkin craft
Age: 5+ | Mess level: 1/5 | Time: 20 minutes
The cleanest and most graphic of the no carve pumpkin crafts. Strips of washi tape applied vertically from stem to base, in alternating colours or patterns, give a pumpkin a bold geometric appearance. No glue, no paint, no drying time. The tape is removable so the pumpkin can be re-decorated.
How to make it:
- Choose three to five washi tape patterns or colours.
- Starting at the top near the stem, press strips of tape vertically down the sides of the pumpkin, alternating patterns.
- Trim at the base of the pumpkin with scissors.
- Add a face from black washi tape cut into triangle and mouth shapes, or draw directly on the tape with black marker.
13. Painted dot pumpkin craft
Age: 5+ | Mess level: 2/5 | Time: 30 minutes
Cover a pumpkin in colourful dots using the end of a paintbrush, a cotton bud, or a pencil eraser dipped in paint. Each dot source produces a different size dot. Alternating dot sizes and colours produces a pattern that looks more considered than it is. This is the craft that most reliably surprises children with how good their result looks.
How to make it:
- Choose three to five paint colours.
- Dip the end of a pencil eraser, cotton bud, or paintbrush handle into paint.
- Press repeatedly onto the pumpkin surface to create dots.
- Change colours and tools to vary the dot size and colour.
- Work in sections, letting each area dry slightly before moving to adjacent areas.
14. Glitter pumpkin craft
Age: 5+ | Mess level: 5/5 | Time: 25 minutes
The only craft in this collection rated 5/5 for mess. Glitter is in a category of its own. If you proceed with this craft, commit fully: newspaper on the floor, craft mat on the table, accept that glitter will be found in this house until February. Eeshan at 6 made a glitter pumpkin and we are still finding orange glitter in places that make no physical sense. The finished pumpkin was spectacular.
How to make it:
- Apply a thick layer of craft glue to one section of the pumpkin.
- Pour orange or gold glitter over the glued section. Shake off excess onto the newspaper below.
- Let that section dry completely before moving to the next.
- Work in sections to avoid the glitter sliding before it adheres.
- Once fully covered and dry, shake off loose glitter and seal with a clear craft spray if desired.
15. Sticker and foam pumpkin craft
Age: 5+ | Mess level: 1/5 | Time: 20 minutes
Press foam stickers, self-adhesive gems, foam letters, or sticker dots directly onto a pumpkin surface to create patterns, faces, and designs. Zero mess, completely independent from age 5, and produces instant results because there is no drying time. Good for situations where you want the finished pumpkin immediately.
Detailed pumpkin craft projects for ages 8 and up
The pumpkin craft projects in this section are multi-session or multi-hour activities that produce display-worthy results. An adult should be present for setup but the child executes the craft independently.
16. Carved-look pumpkin using pumpkin carving kit (adult-supervised)
Age: 8+ | Mess level: 4/5 | Time: 60+ minutes
At age 8, children can use a proper pumpkin carving kit with adult supervision. The small serrated pumpkin saws included in carving kits are safer than kitchen knives because they are designed for the task. Adult scoops the pumpkin; child traces and carves their chosen design. The child should design the face first on paper, then transfer it to the pumpkin surface with a marker before cutting.
Safety note: According to the American Academy of Pediatrics, children under 10 should carve only with adult supervision and appropriate tools. Pumpkin carving kits with small serrated saws are the appropriate tool; kitchen knives are not.
17. Pumpkin yarn wrapping craft
Age: 7+ | Mess level: 2/5 | Time: 45 minutes
Wrap yarn in horizontal bands around a pumpkin, securing with a small amount of glue at the start and end of each colour. Alternating orange, green, and white yarn bands create a striped pumpkin effect. The technique is repetitive and satisfying, and the finished result is completely unique among pumpkin displays.
How to make it:
- Apply a line of hot glue (adult step) at the start of each yarn colour to anchor it.
- Wrap yarn tightly around the pumpkin horizontally, keeping rows flush against each other.
- Change colour by cutting the yarn and starting a new colour with a new glue anchor.
- Work from the base upward, ending near the stem.
- Trim and glue the final end securely.
18. Paper pumpkin lantern craft
Age: 7+ | Mess level: 2/5 | Time: 40 minutes
A pumpkin lantern made from orange card , a cylinder with vertical slits cut partway from each end, then curved and joined to form a spherical lantern shape. A battery-operated tea light inside glows through the slits. Produces the glow of a carved pumpkin with none of the carving, no wax, and complete child execution from age 7.
How to make it:
- Cut a rectangle of orange card approximately 30cm x 20cm.
- Fold in half lengthwise and cut vertical slits from the folded edge, stopping 3cm from the open edge. Unfold.
- Curve the card into a cylinder and staple or glue the short edges together.
- Gently push the top and bottom of the cylinder inward to create the pumpkin sphere shape.
- Cut a circle of green card for the top and cut the stem from green card. Attach.
- Place a battery-operated tea light inside and display in a dark room.
19. No carve pumpkin with mod podge and tissue paper
Age: 8+ | Mess level: 3/5 | Time: 60 minutes plus drying
A real pumpkin covered entirely with overlapping layers of tissue paper in Halloween colours , orange, black, and white , applied with Mod Podge decoupage medium. The finished surface has a layered, papier-mache quality and can include patterns, gradients, and letter shapes embedded in the tissue layers. Spandana made this version with her older classroom students as an end-of-October project. The results were genuinely display-worthy.
20. Pumpkin face collage on giant paper
Age: 5+ | Mess level: 3/5 | Time: 45 minutes
A large pumpkin face assembled as a collage on paper or card , not a real pumpkin but a two-dimensional representation using cut and torn paper, fabric, buttons, leaves, and any other materials available. The scale difference (large paper rather than a small pumpkin) changes the experience of pumpkin crafting entirely. Eeshan and Vihaan made one together last October with a roll of brown paper on the floor. Vihaan added stickers to the pumpkin that he found from an unrelated source. The pumpkin stickers were in fact dinosaur stickers. The pumpkin had six dinosaurs on it. Eeshan negotiated this down to four. They met in the middle.
Supplies for pumpkin crafts halloween
- Orange craft paint , tempera for toddlers (washes off), acrylic for real pumpkins and older children.
- Paper plates, toilet rolls, card stock , for the no-carve pumpkin craft versions.
- Googly eyes , universal pumpkin feature from ages 1 upward.
- Green card and pipe cleaners , for stems and tendrils.
- Black marker , for jack-o-lantern faces on any surface.
- Newspaper , for table covering and for the paper bag pumpkin stuffing.
- Washi tape , for the no-mess no-carve pumpkin version.
- Battery-operated tea lights , for the paper pumpkin lantern.
- Real small pumpkins , available from late September. Decorative pie pumpkins are cheaper than carving pumpkins and better sized for child-made crafts.
For more Halloween craft ideas that pair with these pumpkin crafts, our paper plate halloween crafts and toilet paper roll halloween crafts posts use the same age-sorted format and mess level ratings. And our cute Halloween coloring pages are a good quiet activity while painted pumpkin crafts are drying.
Frequently asked questions
What are easy pumpkin crafts for toddlers?
Among the easiest pumpkin crafts for toddlers: the handprint pumpkin, paper bag pumpkin, and sponge painting. For zero mess, the paper bag version needs only an orange bag, newspaper stuffing, a green pipe cleaner stem, and two googly eyes. No paint needed. For maximum toddler satisfaction, a handprint pumpkin needs only orange paint and paper. Both complete in under 15 minutes and produce something a toddler feels genuinely proud of.
What are no carve pumpkin crafts for kids?
No carve pumpkin crafts include painted pumpkins, washi tape pumpkins, decoupage pumpkins, dot-painted pumpkins, glitter pumpkins, sticker pumpkins, and yarn-wrapped pumpkins. All can be made on real small pumpkins without any cutting tools. Washi tape is the fastest and cleanest no carve option. Decoupage is the most detailed. Glitter is the most spectacular and also the most messy. All produce a display-worthy pumpkin that lasts longer than a carved one because the surface is not exposed.
What age can children start carving pumpkins?
The American Academy of Pediatrics recommends pumpkin carving tools only from age 8 upward, with adult supervision. Children under 8 can hollow pumpkins with an adult doing all cutting, or use the no-carve decorating techniques in this collection which produce equally interesting results without any cutting tools. From age 8, pumpkin carving kits with small serrated saws are appropriate with an adult present. Kitchen knives are not the right tool for children at any age.
How do you make a pumpkin craft with a real pumpkin?
For children under 8, paint or decorate the exterior of a real small pumpkin rather than carving it. Acrylic craft paint adheres to pumpkin skin and dries within 20 minutes. Washi tape applies directly without any preparation. Glue-on decorations like foam stickers, gems, and fabric shapes adhere with craft glue. A small real pumpkin placed in a tray so it does not roll gives a child a stable surface to work on. The finished decorated pumpkin can be displayed for the rest of October and into November before composting.
What are pumpkin crafts for Halloween that use recycled materials?
The best recycled material pumpkin crafts for Halloween are the toilet paper roll pumpkin, the paper bag pumpkin, the paper plate pumpkin, and the newspaper-stuffed pumpkin lantern. All use materials that would otherwise be thrown away. The toilet paper roll and paper plate pumpkins are covered in detail in our companion craft posts. The paper bag pumpkin is the simplest version and requires only an orange paper bag, stuffing material, and a green tie for the stem.

3 Comments